Links (Hyperlinks) component has the following properties in EasyTab:
Link text – The text that will be displayed on the link.
Destination address – the destination URL or ID of the target object if it’s from the same solution.
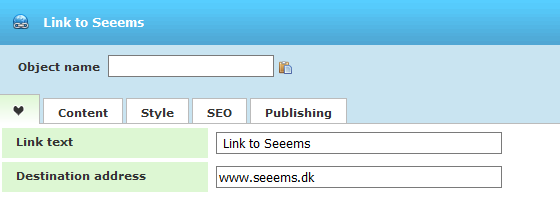
At the very minimum you must fill the Destination address field and it is also a good idea to complete the Link text. If you leave Link text field empty the value from Destination address field will be displayed.
In SEEEMS.CMS if you want to link to content within the same CMS instance you can enter the target object ID in Destination address field. To begin you will probably primarily want to link pages. If you know the Page ID you just have to type it into the address property field. You can also link to other objects, for example, headings. The link component will then trigger the anchor which is created with the heading and open the page and scroll down to the selected heading automatically. There are more special options for links. You can see the ID of some object when you highlight it.
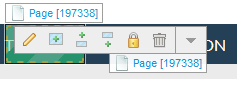
The ID of the Page object from the picture above is 197338. So if we want to create a link which leads to this page we can enter the ID in Destination address property field:
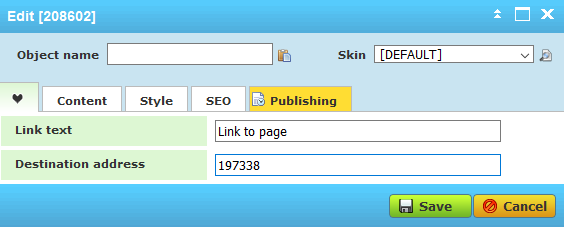
So in Destination address property field you can enter a hyperlink or the ID of the destination Page.
You can perform several actions with Link object:
There is one additional property available in the Content tab – Target. This defines how the linked content is opened. For example it can allow you to open the linked content in a new window, tab or the same page. For more info you can click on Target property name and additional info will be displayed.
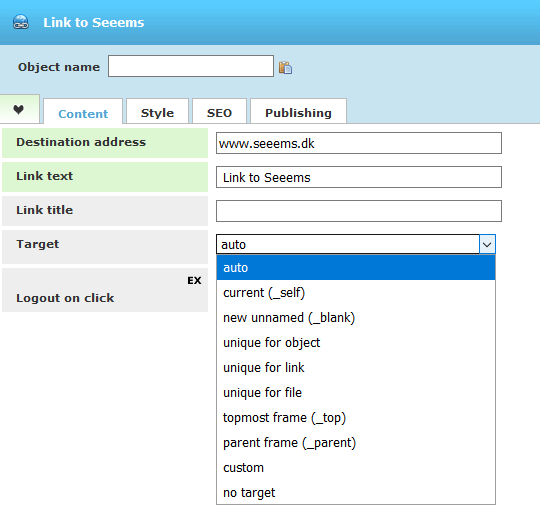
Link title property is for showing a title tooltip with the value from the field when you hover over the link.
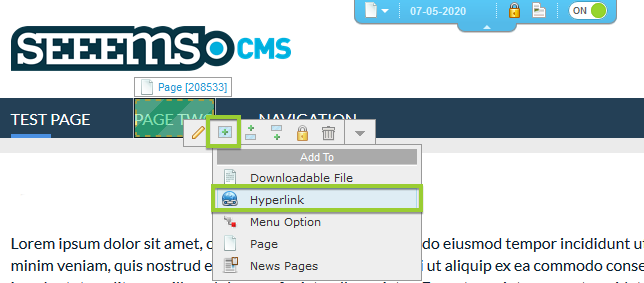
Adding a Link to Menu
Adding a link to a menu is as easy as adding a page to a menu.
- Find the menu option you want to place the link in and highlight it
- Select Add To from the Editing Tools
- Select Link (Hyperlink)
- Complete the property fields
- Save changes and return automatically to the site
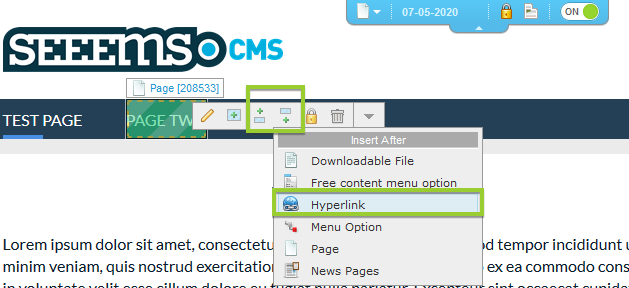
Insert a Link before or after another link in a Menu
- This is the same ass adding a link but instead of Add to you have to use Insert before or Insert after
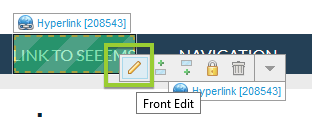
Editing a Link from a Menu
To edit a Link object you only need to highlight it and click on the edit icon (pencil icon) in Editing Tools, make the changes and save.
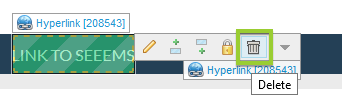
Delete a Link from Menu
Highlight the Link that you want to delete. Choose Delete (Recycle Bin icon) and confirm in the alert dialogue box that you want to delete the object.
Deleted content is placed in the Recycle bin inside Support area in BackOffice and can be restored if required.
Move a link to or from a menu
You can move links within the menu or between a menu area and any content area. Simply drag and move, drag and copy, cut and paste or copy and paste the content. Find out how to do this in the next part of this manual, Objects Moving.
Mailto links in link objects
When creating mail links SEEEMS components that have URL properties will automatically recognize an email address. It will generate a mailto link and you do not need to add the mailto prefix to the email address. You can enter a Link text also and in that case it will display the text and if you click on it it will work as a mailto link. Like the example below:
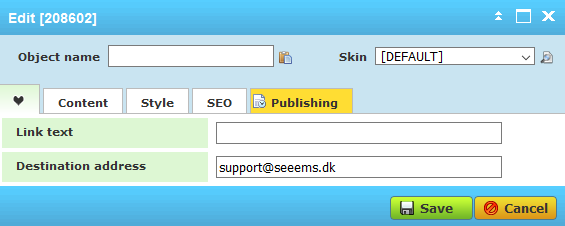
support@seeems.dk
or
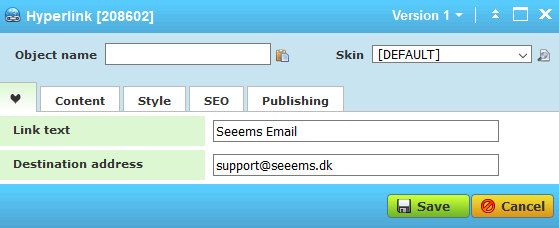
Seeems Email
In both cases from above there is mailto:support@seeems.dk automatically generated.