Checkout procedure
After the Shopping basket is set and the Checkout Page is chosen you can set the checkout procedure. There is Horizontal checkout and Vertical checkout. It’s up to you which one you will choose when setting the Checkout link property in Shopping Basket object.
In Checkout page there is a Form object with sub objects, shopping basket object, Options Selector object for payment methods and delivery. You can edit most of the objects directly from Font Edit Panel or in BackOffice.
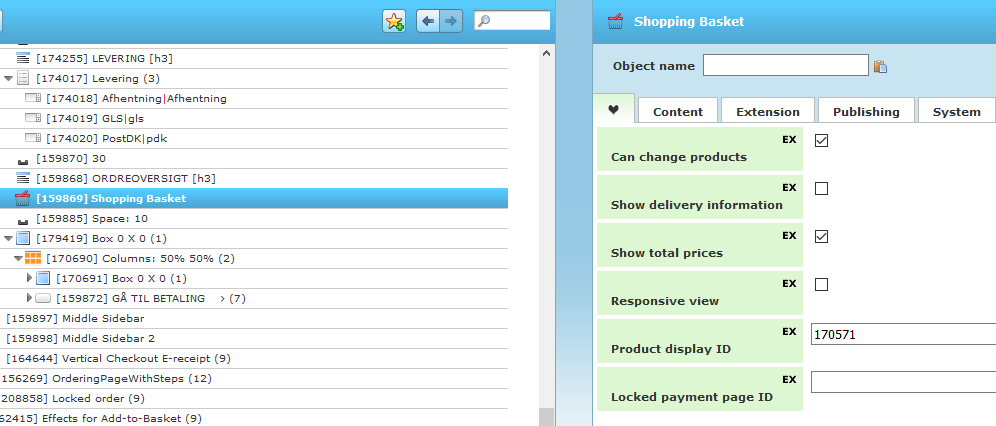
Shopping Basket object inside the Checkout Page has some properties settings.
After the Shopping Basket object there is a Box object with Checkbox object for Terms and Condition and Button object for Checkout (Go to payment). This button object has sub-object with different settings that are responsible for saving the form fields, basket and delivery fields, and also the payment.
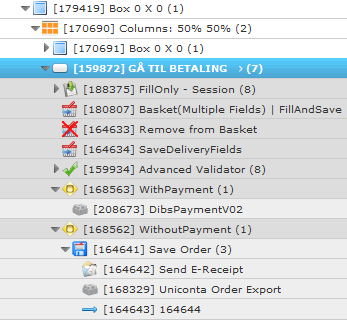
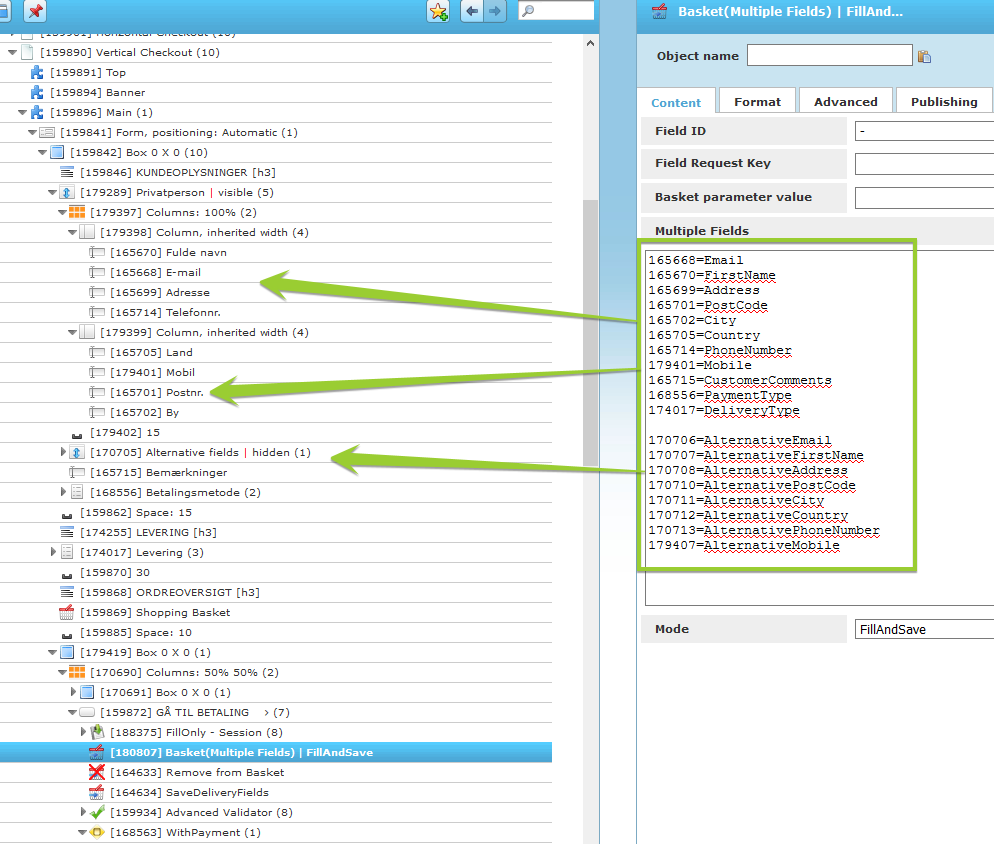
Save to Basket object is used to create an action that will fill, save(or both) specific form fields that are entered by the customer. Basket (Multiple Fields) is used to fill and save the customer form fields – Email, Name, Address, etc.
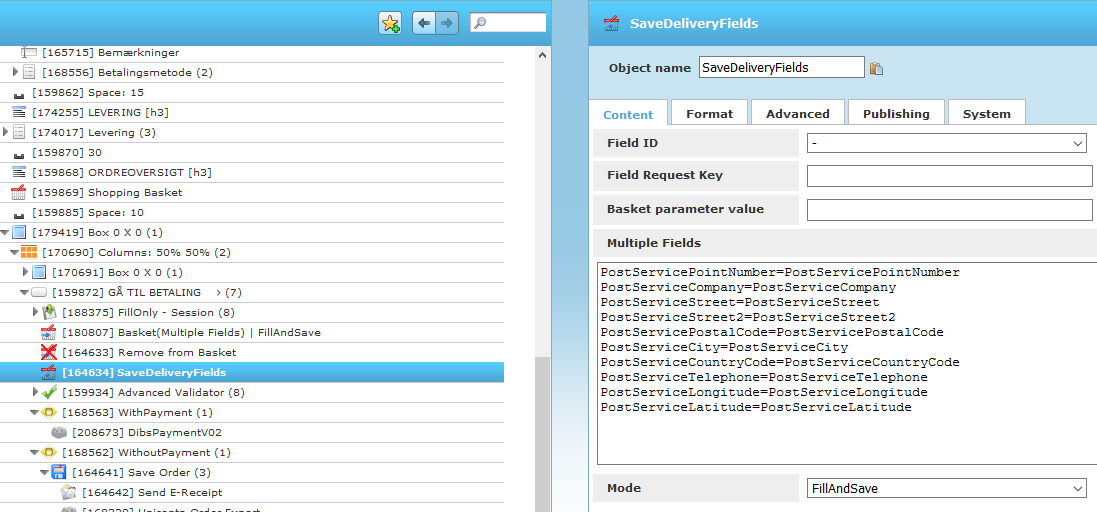
There is another Save to Basket object which one is responsible for the delivery information.
Remove from Basket object creates an action that removes an item from the shopping basket.

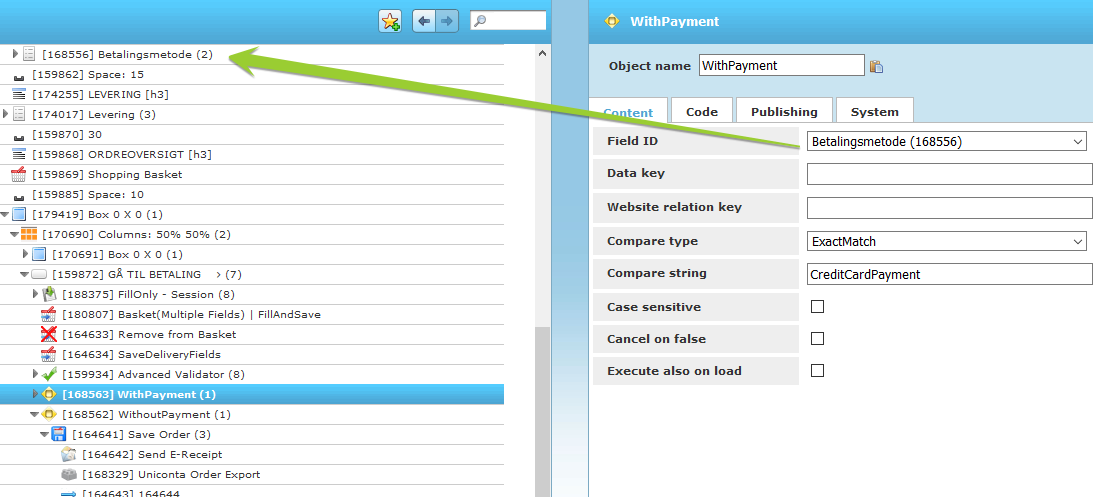
There are also Condition objects which are based on payment type with or without payment. The Condition object has Field ID property that takes the payment type from the customer form.
Payment
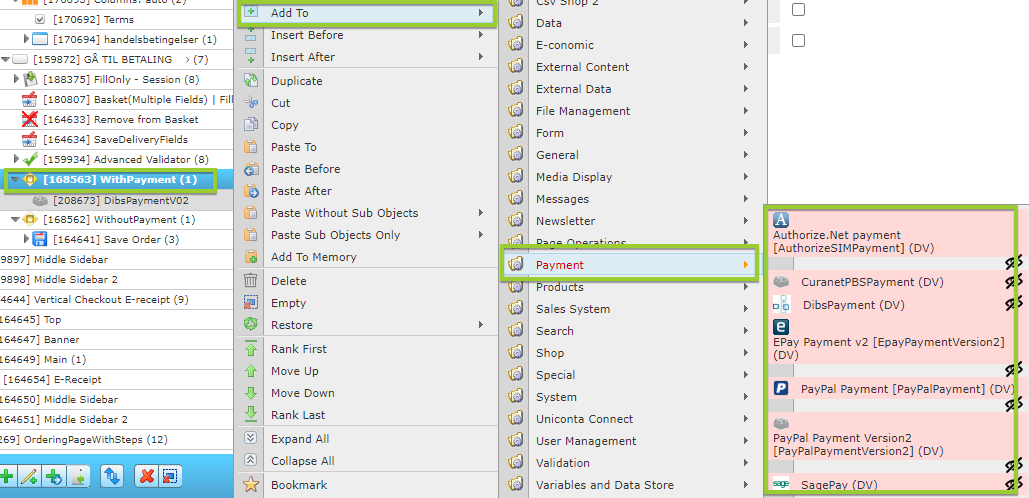
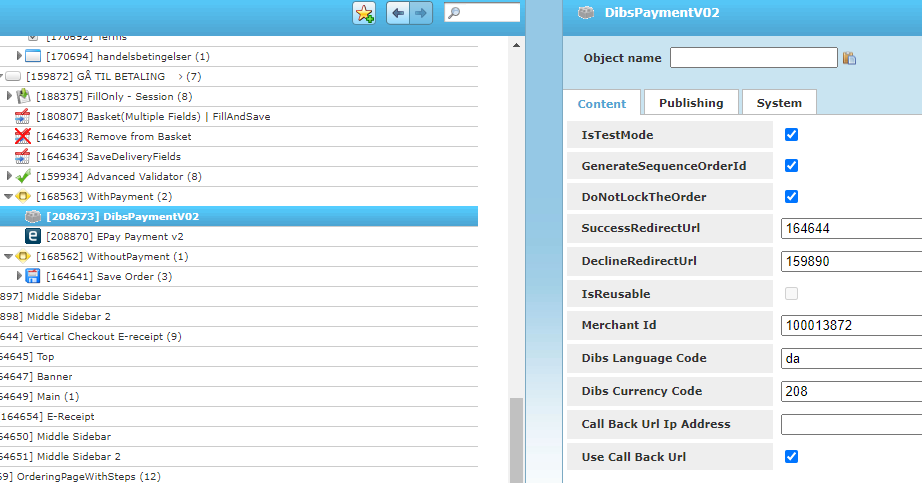
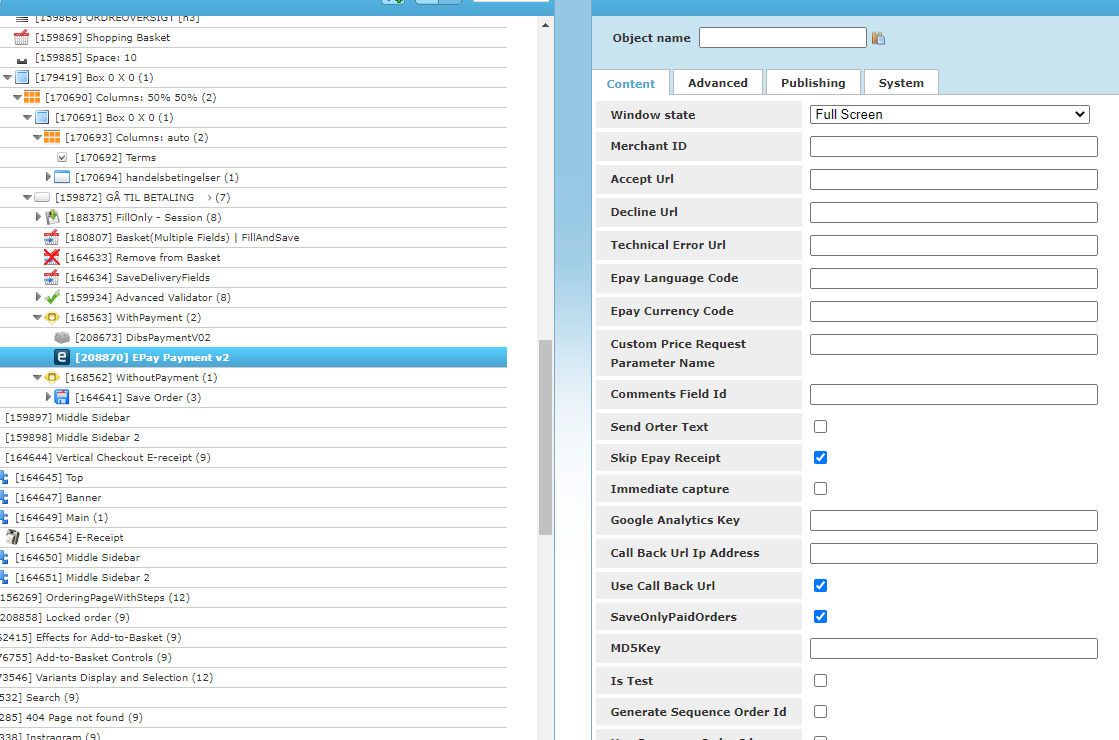
There are different types of payment objects available like EPay , PayPal, Dibs, etc. You can add them to Condition object – Add To -> Payment -> Payment type. Each one of them has individual properties and settings. We are not going to look at them in details now.

Based on the settings there are sub-objects inside Condition objects. The Save Order object creates an action that allows the order to be saved on the system and to the user profile. Inside of Save Order object there are other sub objects.
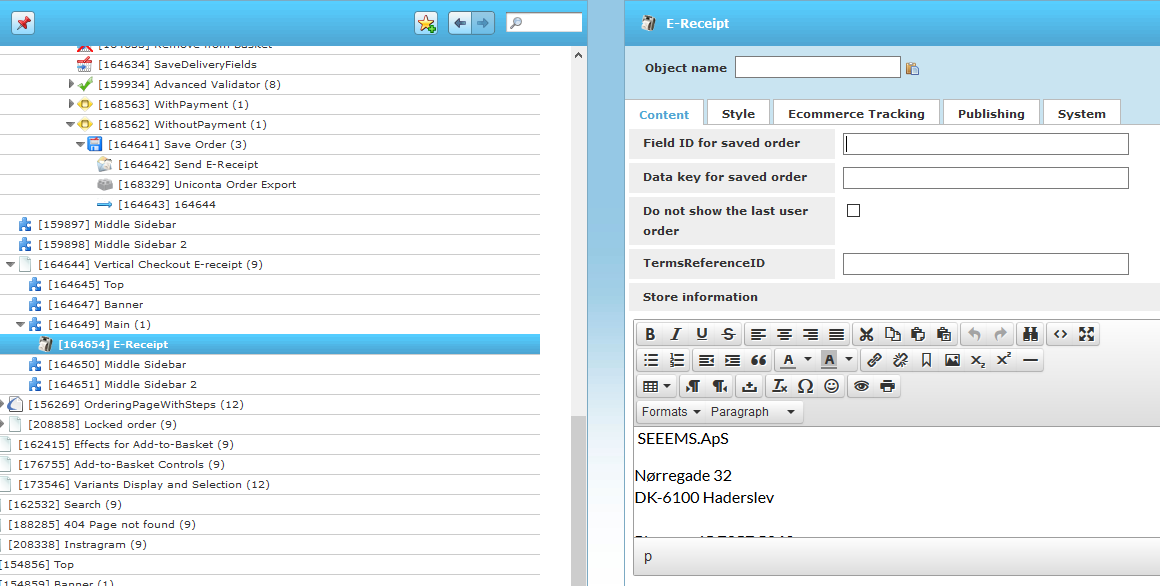
Send E-Receipt object creates an action that will send an e-receipt to one or more recipients based on the property values.
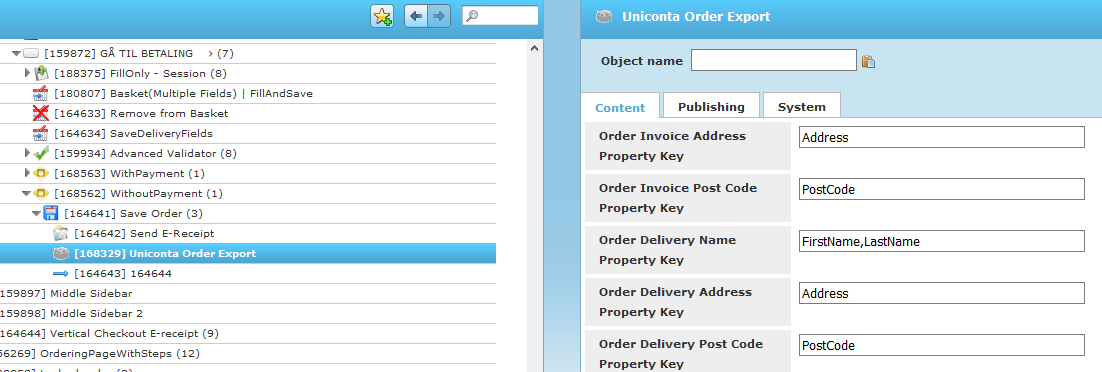
There can be export for ERP system - in our case Uniconta Order Export object with its property settings.
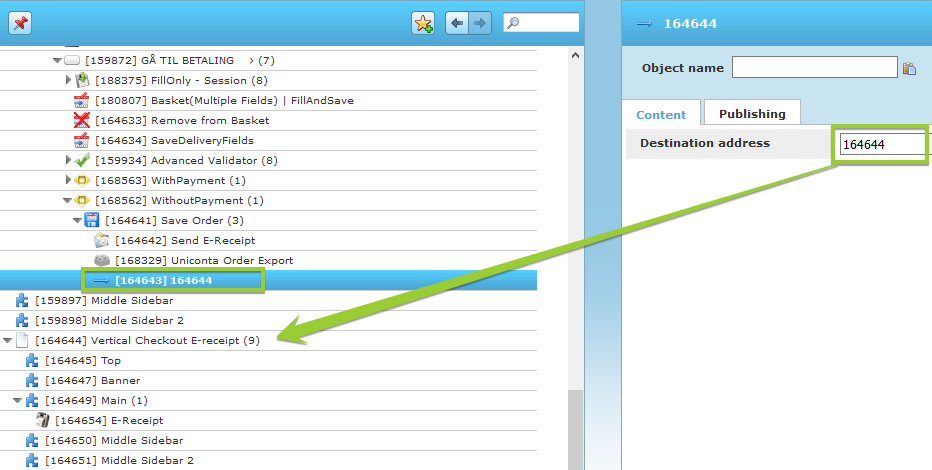
At the end there is a Redirect Action object which redirects to another page after the user submits the form. For the checkout procedure most of the time it redirects to E-Receipt page.
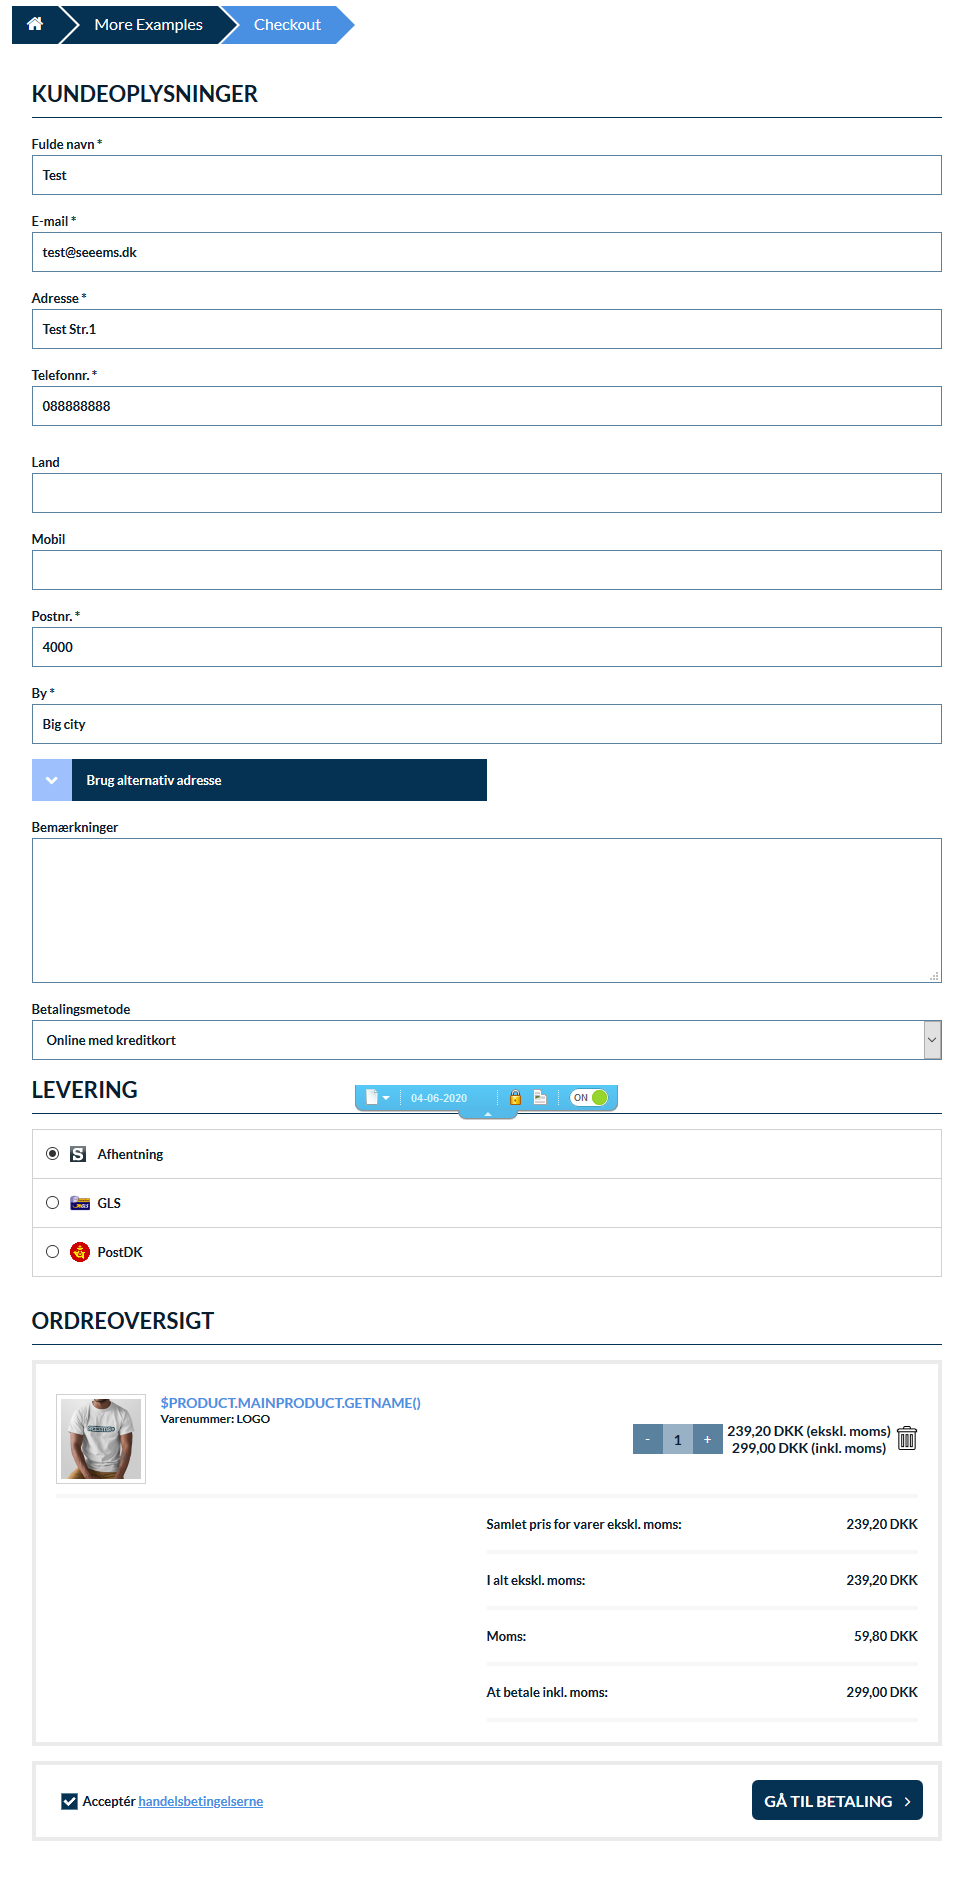
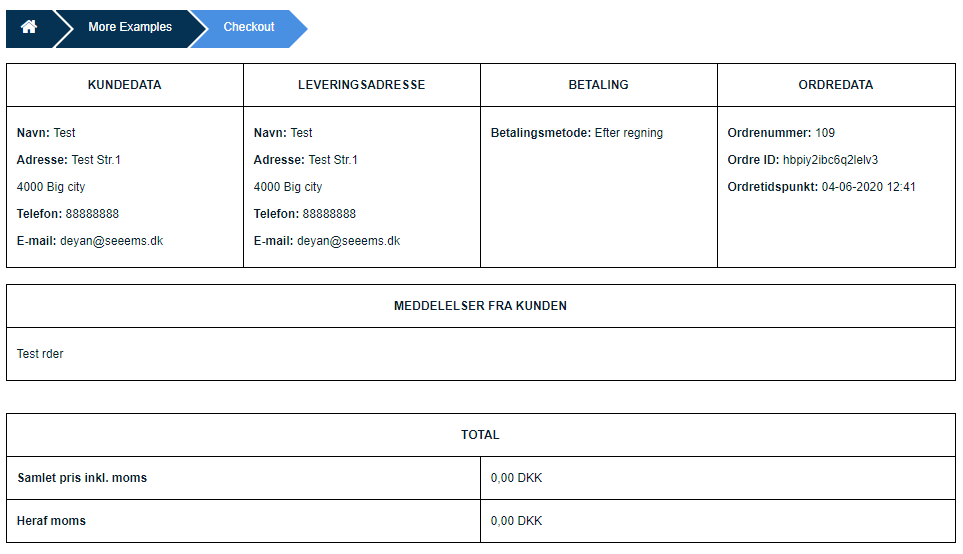
This is how the checkout page looks:
Checkout E-Receipt
There is E-Receipt send and after the Checkout is done and payment is made. There is also an E-Receipt page with the corresponding E-Receipt object inside.
The E-Receipt page looks like this:
In order to see and check how the shopping basket and checkout procedure works, visit our demo webshop.