Content
Creating Categories and Products
Creating Categories
Category Images
Creating Products
Showing Categories and Products on Webshop
Product View
Product View Source
Product Categories
Product Categories – Product Display Content
Products
A webshop consist typically of products placed in categories, a basket and a checkout procedure. Sometimes there are also products with variants or some other additional features. Let’s check the categories and the products in details.
Creating Categories and Products
In order to show categories with products on the webshop you have to create them first. Let’s start with creating Categories.
Creating Categories
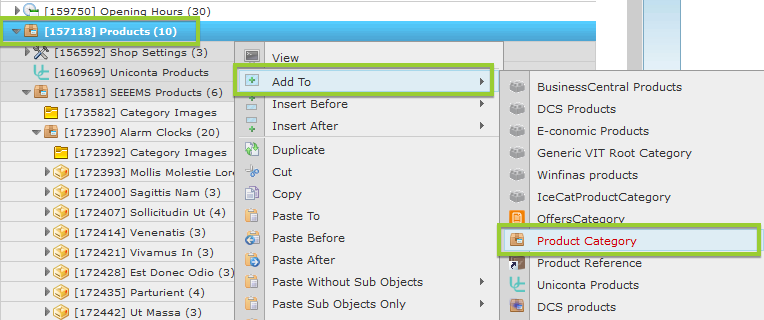
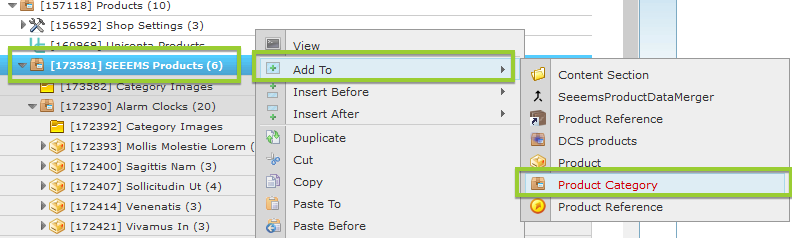
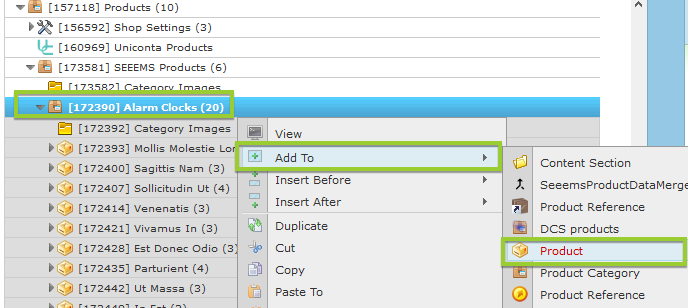
On root level in Seeems BackOffice you have to create Products component. Inside of it you can place Product Category objects. There can be as many Category objects as you want. Just right click on Products object and select Add to -> Product Category.
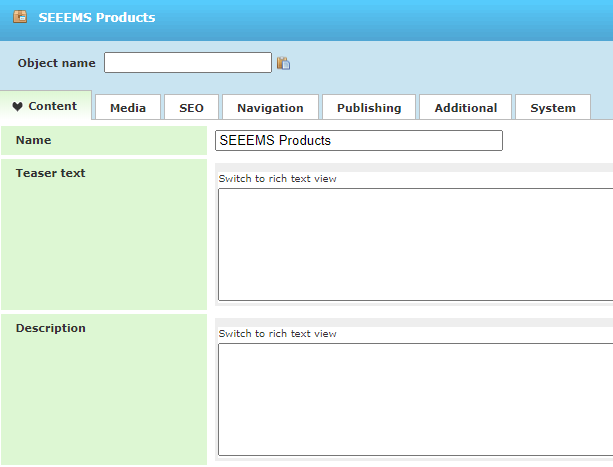
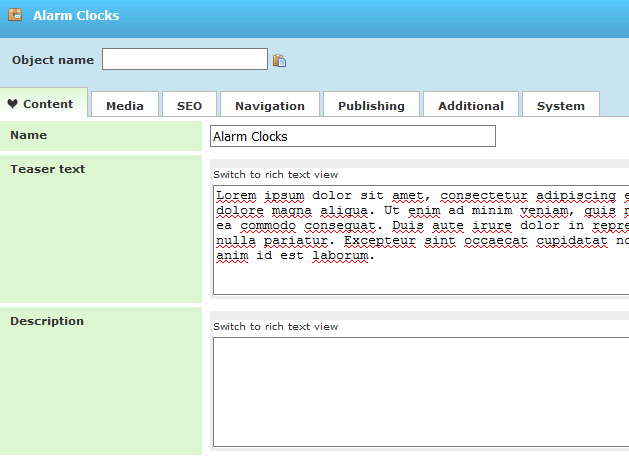
You can set the Name that will be displayed, and optionally Teaser Text and Description in Easy tab properties fields
Inside of the created Product Category object you have to add another Product Category objects that will be displayed as a Category in your webshop. You can create as many as you want. Right click on previously created root Product Category and choose Add To -> Product category.
There are the same properties in Easy TabTab – Name of the Category that will be displayed, and optionally Teaser Text and Description in Easy tab properties fields.
Category images
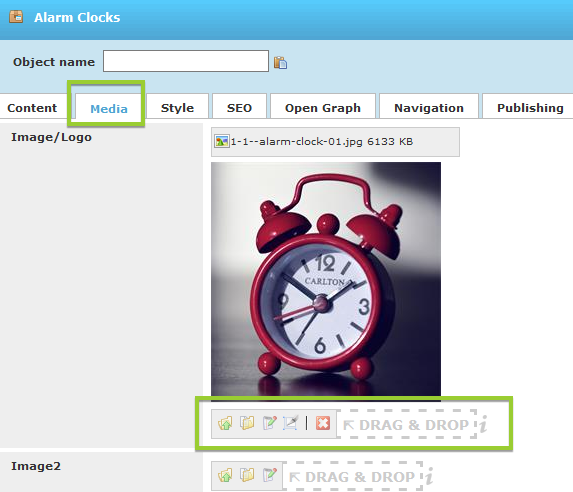
You can use the Media tab of Product Category object in order to add an image for the product category. Just choose or upload an image for the corresponding category.
Category images
If you leave the Image property in Category object empty it will take the image from the first product, if there is such one, and display it as a category image.
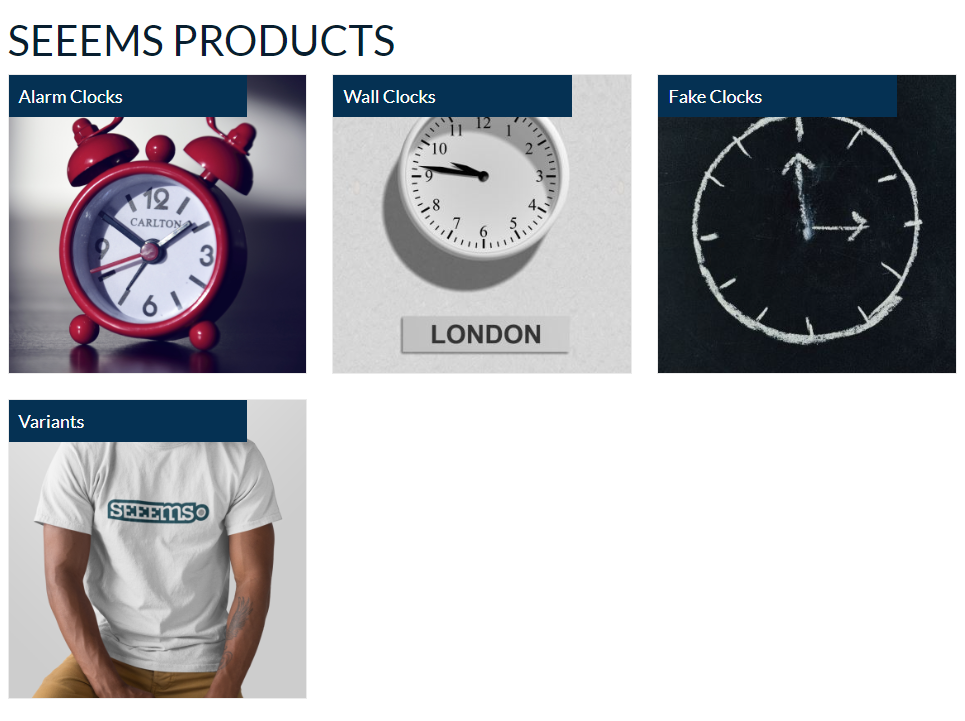
After the changes the result on the webshop categories page will be like this:
Product categories
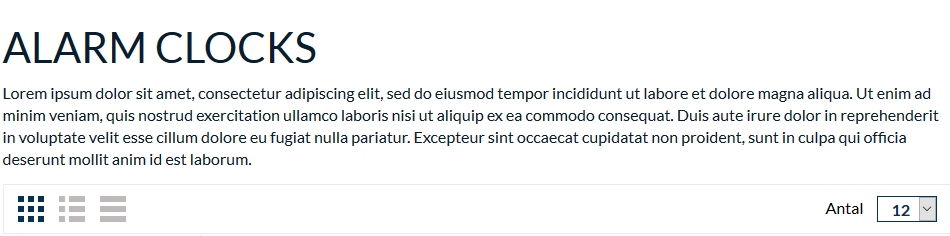
Product category
Creating Products
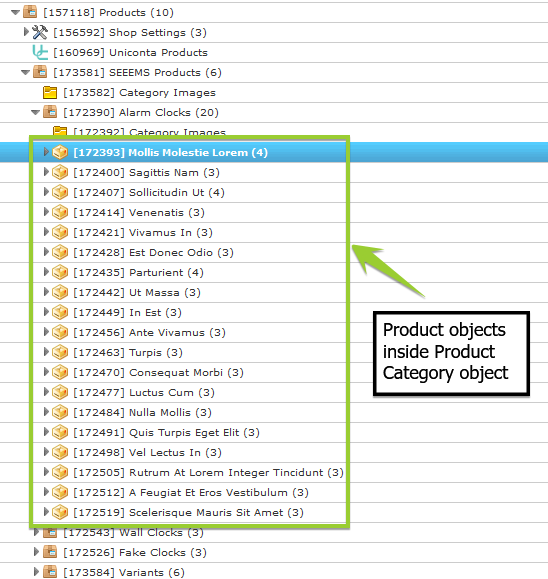
You can add Product objects as a sub object to Product Category. Right click on Product Category and choose Add To -> Product
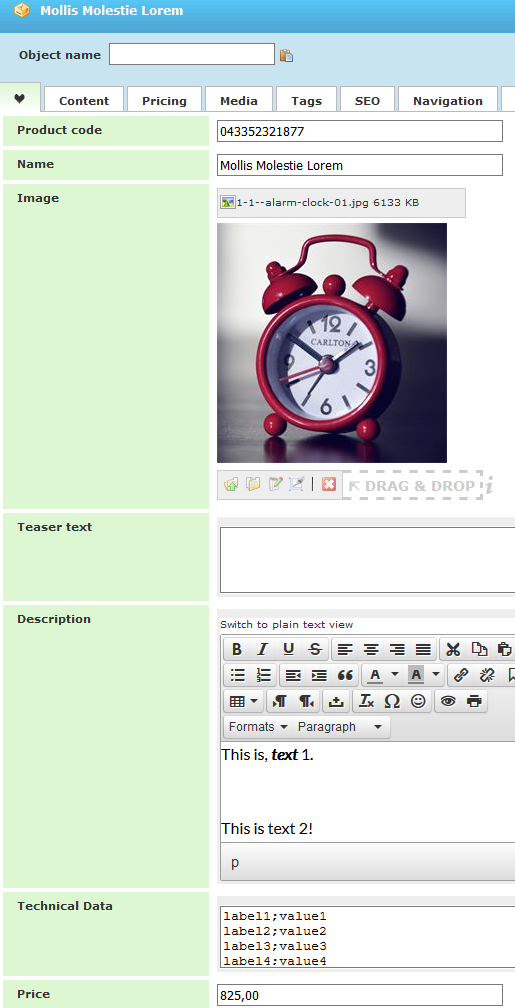
You can find the most used properties in Easy tab:
- Product code – this is unique identifier for the product. It is usually the same as SKU
- Name – name of the product
- Image – this is the general product image
- Teaser text – short description of the product. If empty the description is used but cut
- Description – description of the product
- Technical data – technical data for the product
- Price – price of the product.
Showing Categories and Products on webshop
In order to display the categories and products on your webshop you have to make some additional settings - set the Product View and Product View Source objects, relate them to each other, and set which Product Category object they are going to use and show on website.
Product View
In Main section of the webshop page we have a Product View in which you have to enter the id of the Product Pages object that is used to show the product details pages. If this one is left empty, the Product Pages object that is used for the product overview is also used for the details. In the example below we are setting the Product details page to 156311 which is the ID of the Product Page.
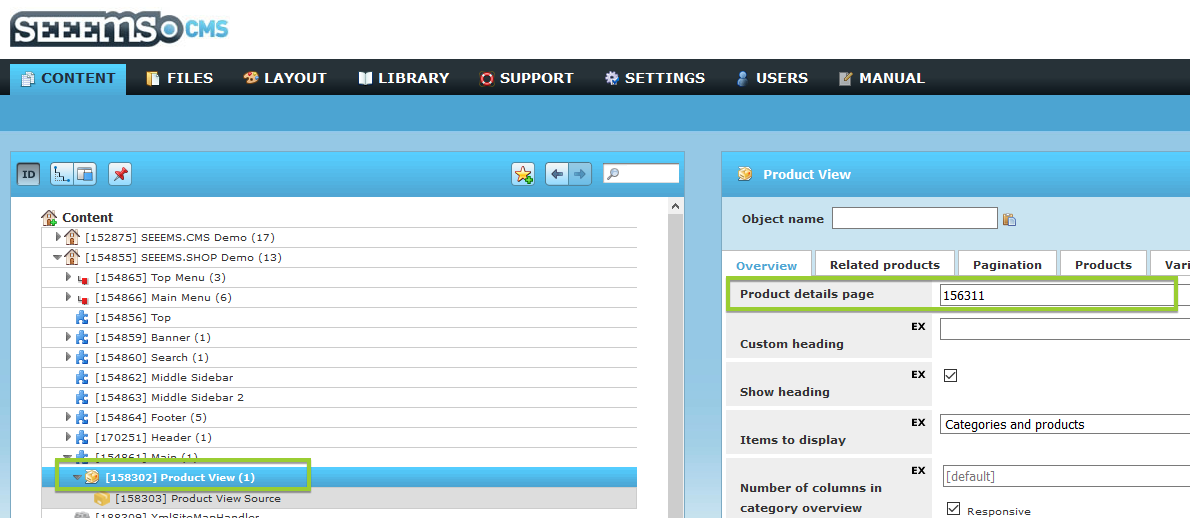
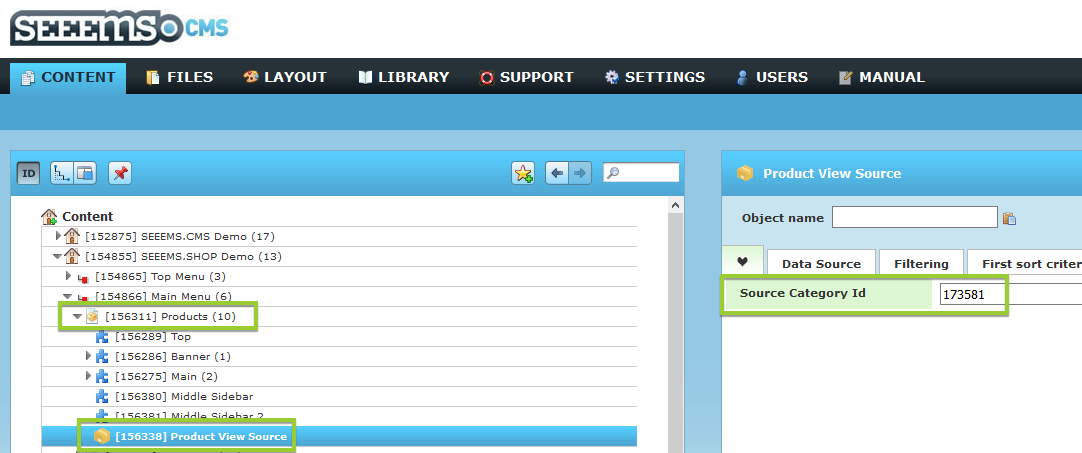
Product View Source
Inside Product Page object there is a Product View Source object where you have to define the Source Category ID. In our case we are entering 173581 as Source Category ID which is the ID of the category with products that we want to display.
Product Categories
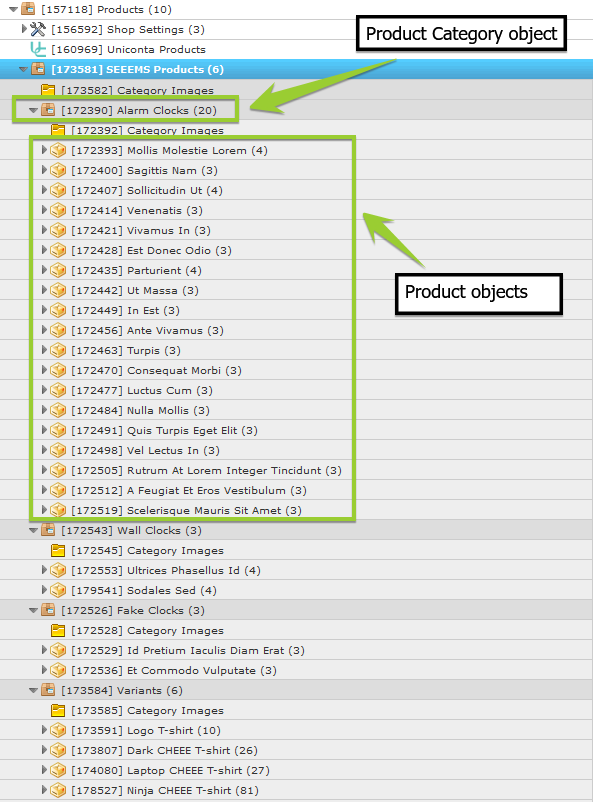
There is a main object called Products which is responsible for the Categories and Products in webshop. Inside of it you can add Product Category objects as a sub object. You can place as many Product Categories as you want. This Product Category object is the one that we are referring to from Product Source view object and it’s a wrapper. It will be used as main category object and inside of it you can place all of the Product Category objects that will be shown in webshop as categories with their Products inside. There can be a hierarchy of categories that resemble a tree structure.

Product Categories – Product Display Content
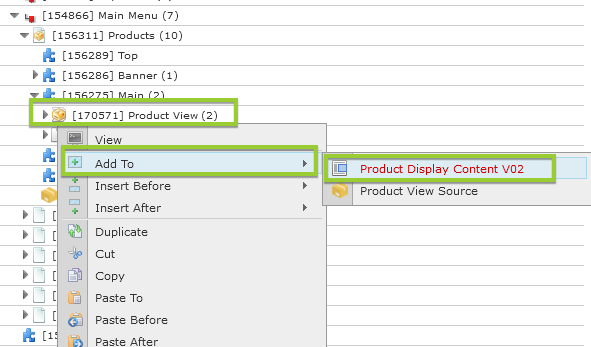
There is a possibility to add Product Display content for each Product Category individually. To do this you have to use Product Display Content Component. To do this select the Product Display (Product View) object and choose to Add to it Product Display Content Component.
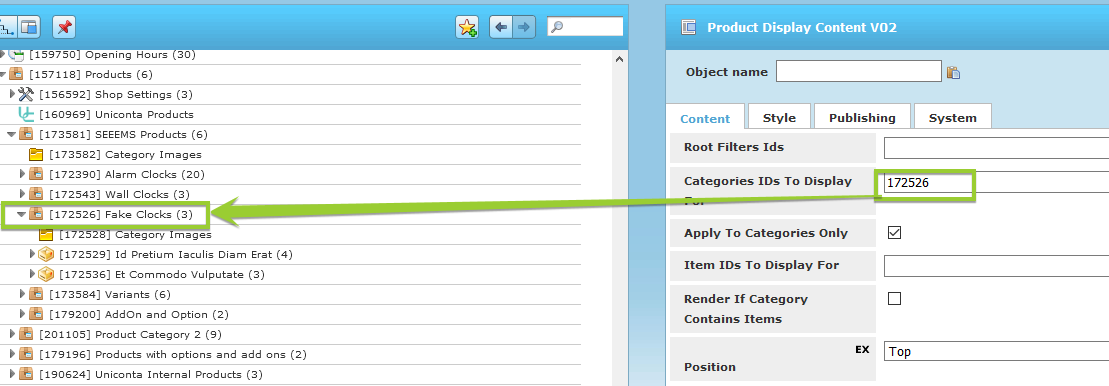
You have to specify for which category the Product Display Content will apply. Just enter the ID of the category in Categories IDs To Display For field.
After the Product Display Content is added you can add to it as many components as you want. Just use Add To and choose the component that you want to add. Based on the Position property you can choose to set them on top or bottom of the corresponding product category.
Let’s add for example an Image component and Text below.

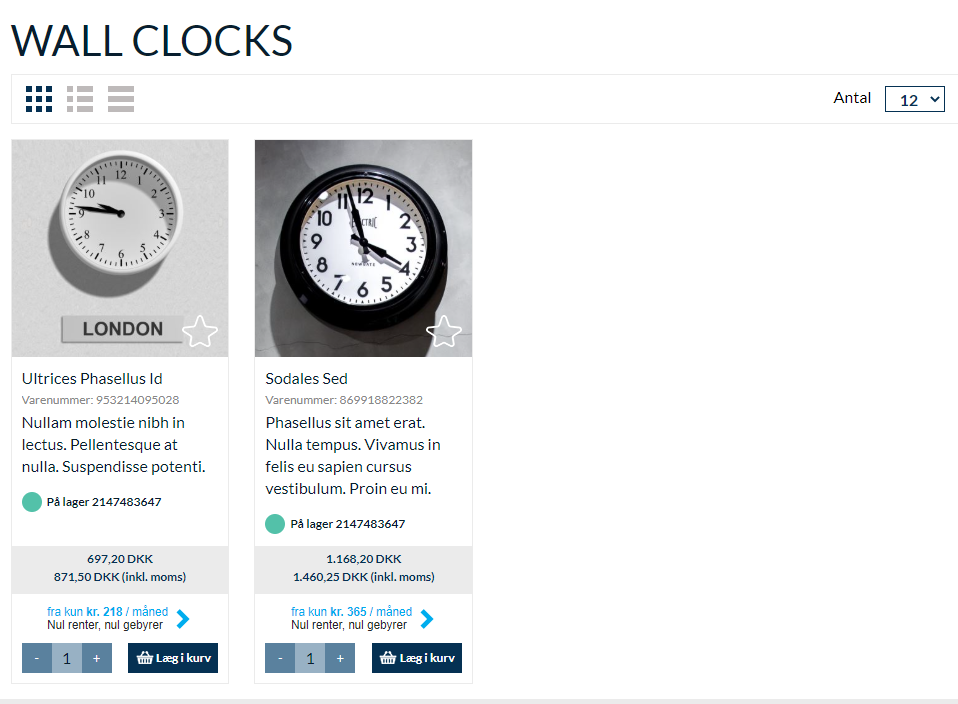
The result on the page is the following:
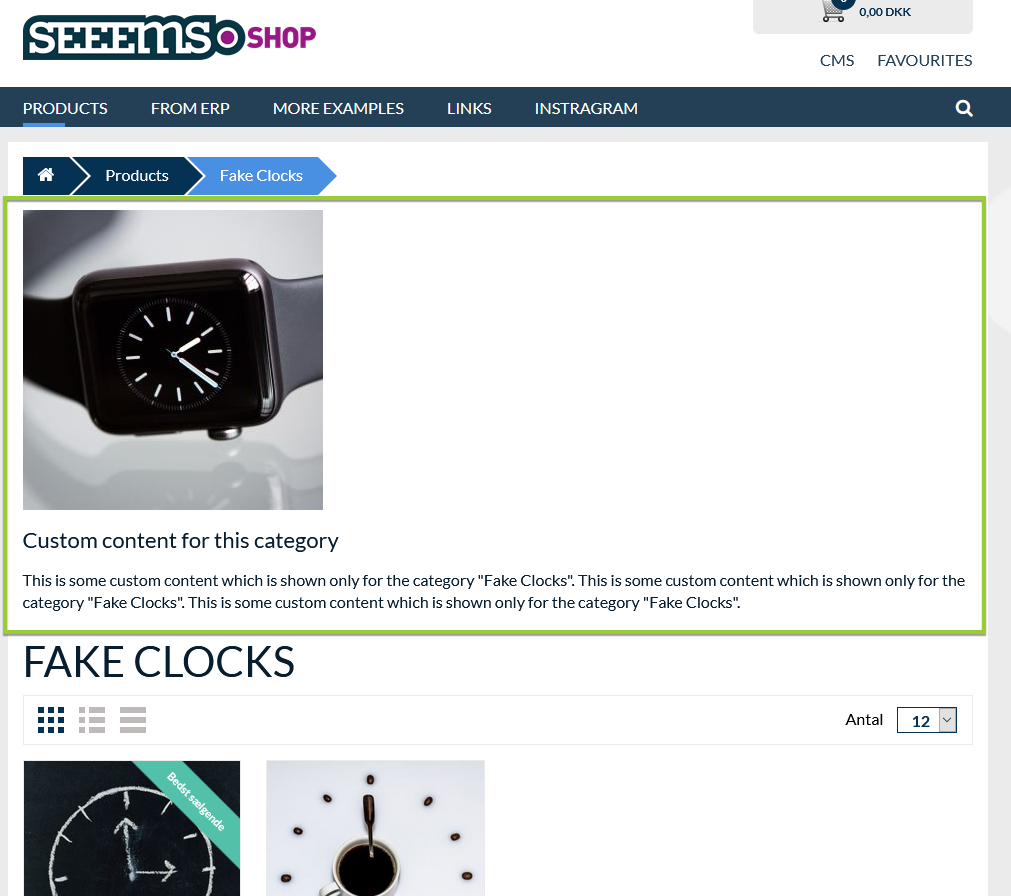
The highlighted in green area with image and text inside is the one that we add to our Product Display Content object.
Of course, this can be done also in Product Category obbject itself but the main reason and advantage to do it with Product Display Content Component is when you have external products coming from .csv file or some ERP systems like Uniconta or C5.
Products
The Product Categories are used to organize the products. Inside every Product Category object you can add a Product component for the corresponding category. The Product object is representing the product that will be used for the webshop.
Let’s take a real example in order to make the whole process clearer.
We have a Product View inside Main section. We have to refer it to Product Pages object. In our case the ID of Product Pages object is 156311 so we are entering it in the Product details page property field.

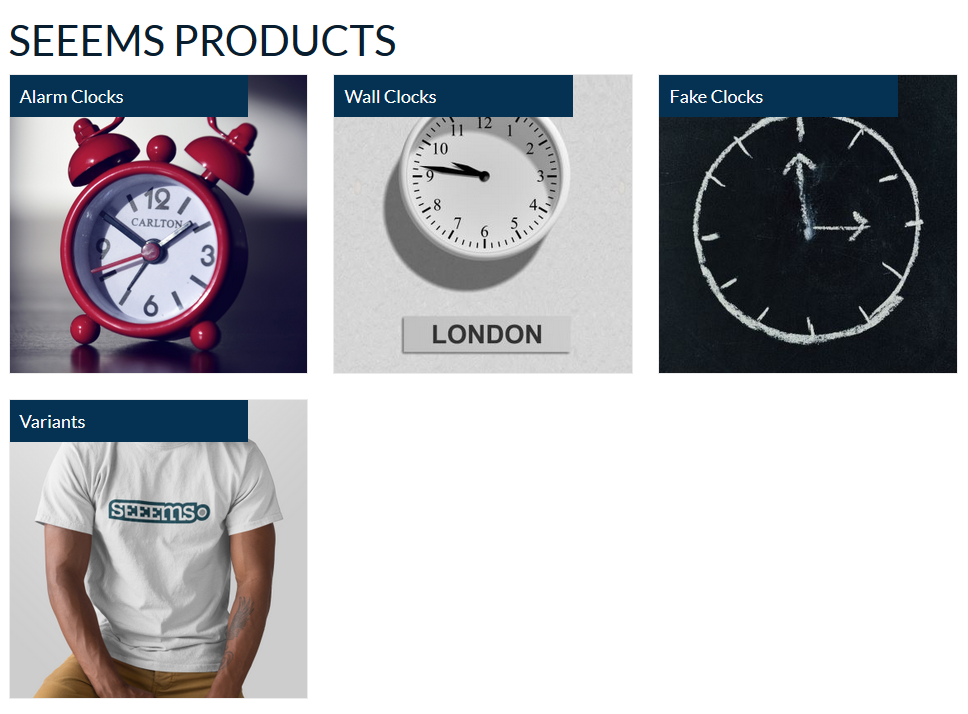
The Product Pages object itself has a Product View Source object as a sub object. The Product View Source object is referring to the Product Category object that we want to use in order to display the categories and products which are placed inside of it. In our case we want to display the categories and products within Product Category object called SEEEMS Products. So in Source Category ID property field of Product View Source object we are entering the ID of SEEEMS Products Category object which is 173581. Of course, we assume that SEEEMS Products Category object is created before that reference.

In SEEEMS Products Category we have Product Category objects as sub-objects and inside of them are placed the corresponding Product objects. We can extend the list with products and categories at any time.
And this is how it looks on the website. As you can see all of the categories inside SEEEMS Products Category object are shown and inside of them there are the corresponding products.