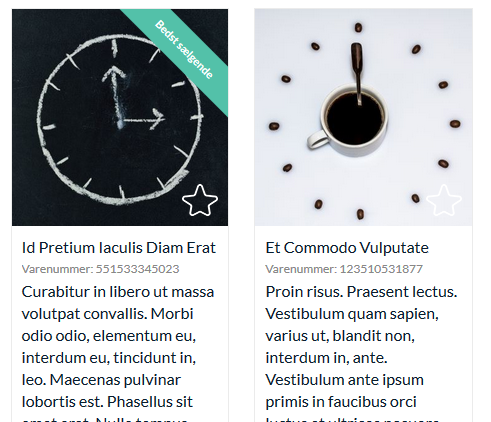
You can set a tag for product and based on the layout it will show on the corresponding product.
For real examples visit our demo webshop.
Tag Definition
First you have to define the tags. To do that you have to go to Tag Source object on root level in Content. Inside of it there are Tags Collection objects. If you want to create a new collection you just have to Add such one. Inside the Tags Collection as sub-objects are placed the Tags Definition objects.
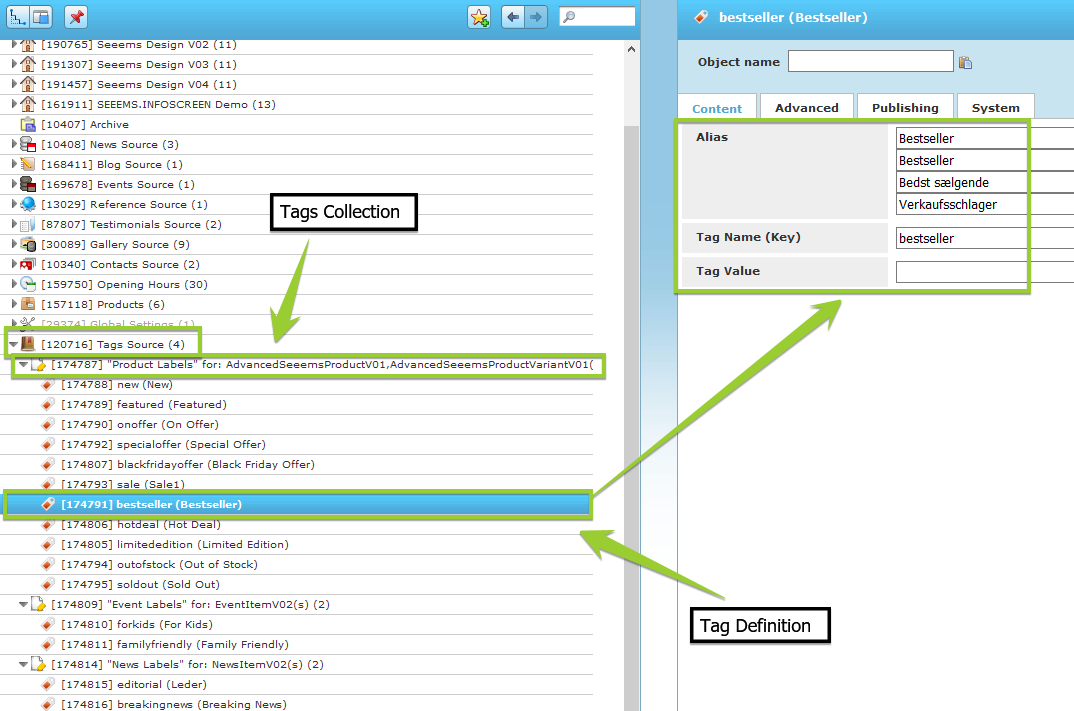
Tag Definition object has the following properties:
- Alias – this is the text that appears as a tag
- Tag Name (Key) – name of the tag that will be used in products settings
You can edit the present ones tag Definition objetcs or Add such ones to the corresponding Tags Collection.
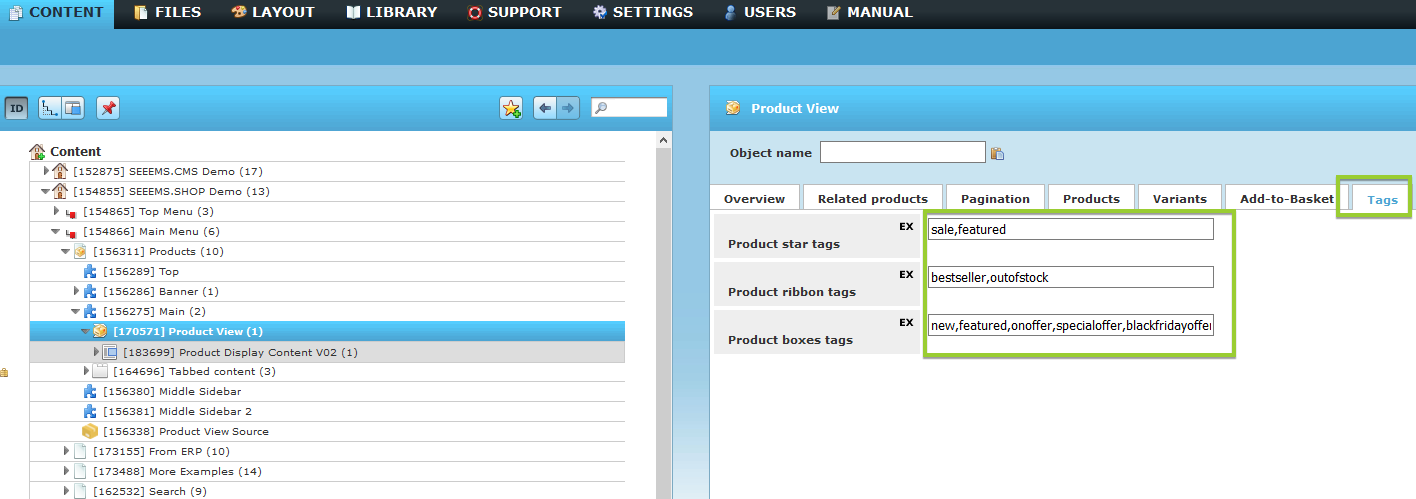
Setting the Tags in Products Display
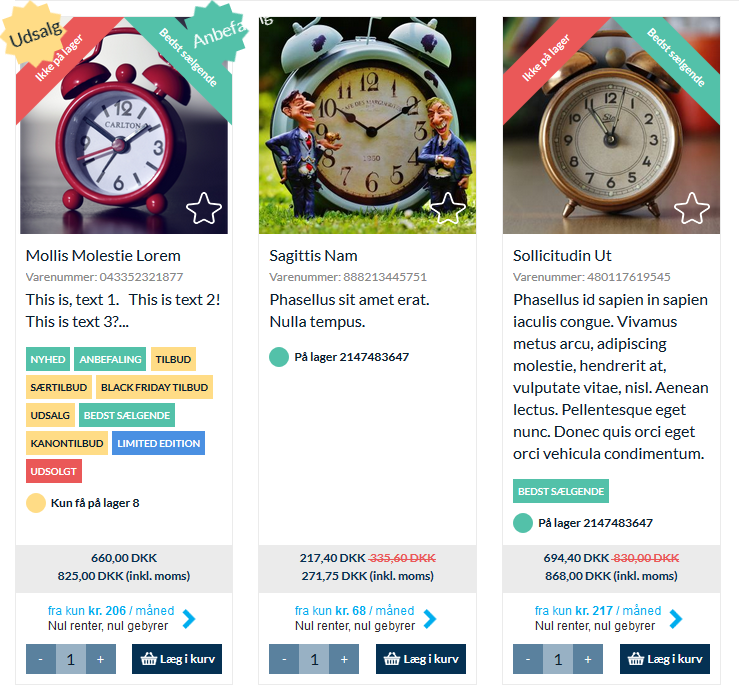
In Product Display (View) object there is a tab called Tags and here you have to define how the tag should be displayed - star, ribbon or boxes. Here you will need to enter the Tag Name (Key) property based on Tag Definition object from previous step:
Setting Tags in Products
You can go to the Product object tab for which one you want to set a tag and click on Tags tab. There you will find Product tags property with all the available Product Labels based on the settings from the previous steps. You can choose one or several tags.

The tag will be applied and displayed on the website for the corresponding product.