Now that our empty Component is working, we can begin to add a few attributes to it and thus slowly shape our Component into something useful. Of course there is a vast amount of different Components we could make of our basic shell, but for this lesson we will settle on creating the basis for a Blog Component entitled MyBlog. So our first step is to rename the MyComponent to MyBlog and at the same time we will let it extend the slightly more advanced SiteComponent Class which adds some publication and authorisation properties that are not found in the more basic Component Class.
 ...
 public class MyBlog : SiteComponent { ... }
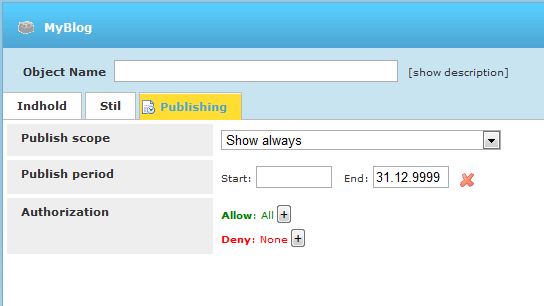
We can now see that a new pane along with some authorisation properties have appeared for our Component as seen below.

Component authorisation properties
Since we have decided to create a Blog Component, the next natural step is to add an appropriate Caption and Description attribute to the MyBlog Component. This is done in a similar fashion to the Parent attribute from before.
... [Caption("My Blog")] [System.ComponentModel.Description("This is a Blog Component")] ...
If we take a look in the BackOffice now, we can see how the caption has changed and the description pops up at the caption.
Furthermore, we should also put it in a more specific folder than the General folder that it was assigned to by the framework, which can be done by using the Toolbox attribute.
... [Toolbox("Community")] ...
If we look at the BackOffice, we see that our Component is now called My Blog and is located under the Community folder.
Good, now if your Constructor looks something like the following code, you should be ready to start adding some properties to the Component.
 ... [Parent("Content")]
[Caption("My Blog")] [Toolbox("Community")]
[System.ComponentModel.Description("This is a Blog Component")]
public class MyBlog : SiteComponent {
 ...
  } ...